Downloading and installing the VMware replication agent (HVRAgent)
Task
Download and install VMware replication agent (HVRAgent)
Solution
VMware Agent requirements
Hystax VMware Replication Agent requires the following user permissions in vSphere (Role “VMware Consolidated Backup user” in vCenter):
- Datastore > Browse
- Datastore > FileManagement
- Virtual machine > Configuration > Disc Lease
- Virtual machine > Interact > Power On
- Virtual machine > Interact > Power Off
- Virtual machine > Provisioning > Allow read-only disk access
- Virtual machine > Provisioning > Allow virtual machine files upload
- Virtual machine > Provisioning > Allow virtual machine download
- Virtual machine > Snapshot management > Create snapshot
- Virtual machine > Snapshot management > Remove Snapshot
Permission to access CBT is necessary for the correct performance of the application. To enable CBT:
- Virtual machine > Configuration > Disc change tracking
Additionally, it is recommended to include the following global permissions:
- Global > Disable methods
- Global > Enable methods
- Global > Licenses

In case of using vCloud, vCenter user requires one extra permission to operate: Profile-driven storage > Profile-driven storage view
Ports for the correct performance of the agent:
- DR host - tcp/80, tcp/443
- vSphere host - tcp/443
- ESXi host(s) - tcp/udp/902
- Receive logs from the Acura cluster - udp/12201
Download and install the agent
Click on the "Download agents" button to the left.
Choose a customer, click "Next".
Select an agent type and click "Next".
Select the machine group, where the machine should appear. Choose a protected VMware vSphere or create a new VMware vSphere. Select Agent network settings Click "Next".
For a new VMware vSphere and static Agent network settings you need to fill in the fields. Click on the '?' for hints about fields.
To get the agent, click on the “Download Agent” button.
- Deploy it on each ESXi host in your VMware cluster that you want to protect.
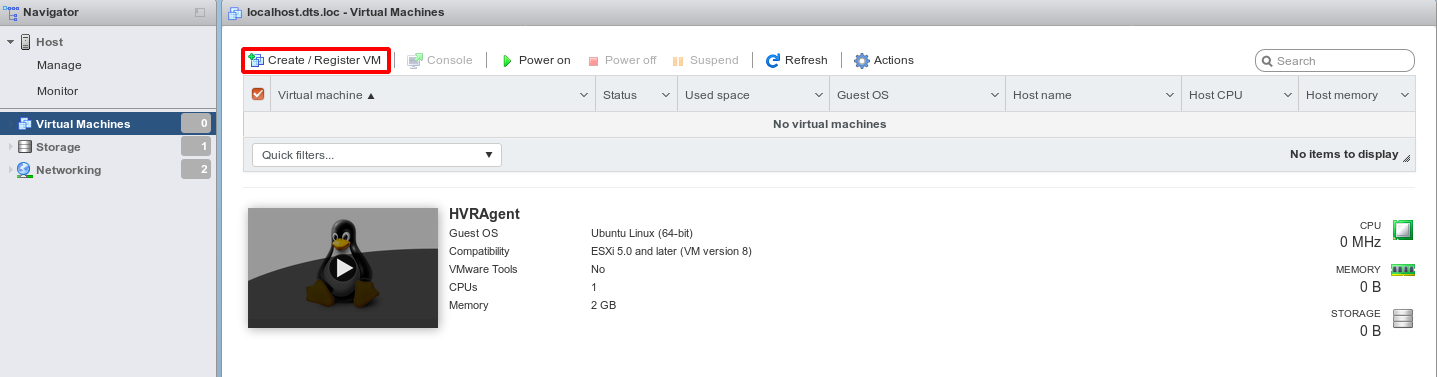
- Select "Create/Register VM".
- Select "Deploy a virtual machine", click Next.

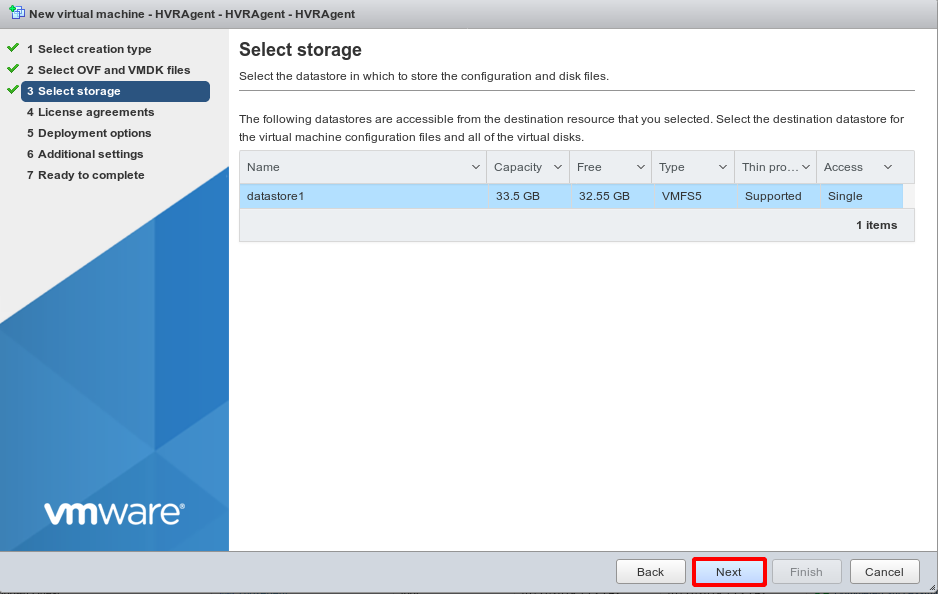
- Enter a name for the machine, it can be any. Select the dowloaded OVA file, click Next.

- Follow the wizard on the ESXi.


Related Articles
Downloading and installing the Windows Replication Agent (HWRAgent)
Task Download Windows Replication Agent (HWRAgent) Solution Requirements for the correct performance of the Windows agent: Hardware: Memory: 2 GB RAM CPU: x64 processor Disk space: 100 MB required for product installation and not less than 15% free ...Downloading and installing the Linux Replication Agent (HLRAgent)
Task Download Linux Replication Agent (HLRAgent) Solution Requirements for the correct performance of the Linux replication agent: Hardware: Memory: 500 MB RAM Disk space: 100 mb required for product installation and not less than 15% free space of ...VMware vSphere permissions required to install the Hystax external replication agent
Hystax VMware Replication Agent requires the following user permissions in vSphere (Role “VMware Consolidated Backup user” in vCenter): Datastore - Browse Datastore - FileManagement Virtual machine - Configuration -- Disc Lease Virtual machine - ...Installing internal Replication Agents on multiple machines at once
Task Perform mass deployment of internal Replication Agents to several machines with the same OS at once (Windows or Linux). Solution The PowerShell script for a Windows installation and the Ansible-playbook in case of Linux machines are available ...Which permissions are needed on VMware to start a failback
A user needs the following permissions to start a failback to ESXi 6.0 and older version: VirtualMachine.Inventory.Create VirtualMachine.Configuration.Add New Disk VirtualMachine.Configuration.Raw Device Resource.Assign VirtualMachine to Resource ...